In Odoo, the Ship Later feature is designed to help businesses manage orders that can’t be shipped immediately. This functionality provides flexibility in handling orders based on product availability and customer preferences.
Let’s enable the Allow Ship Later feature from the POS module and Configuration -> Settings.
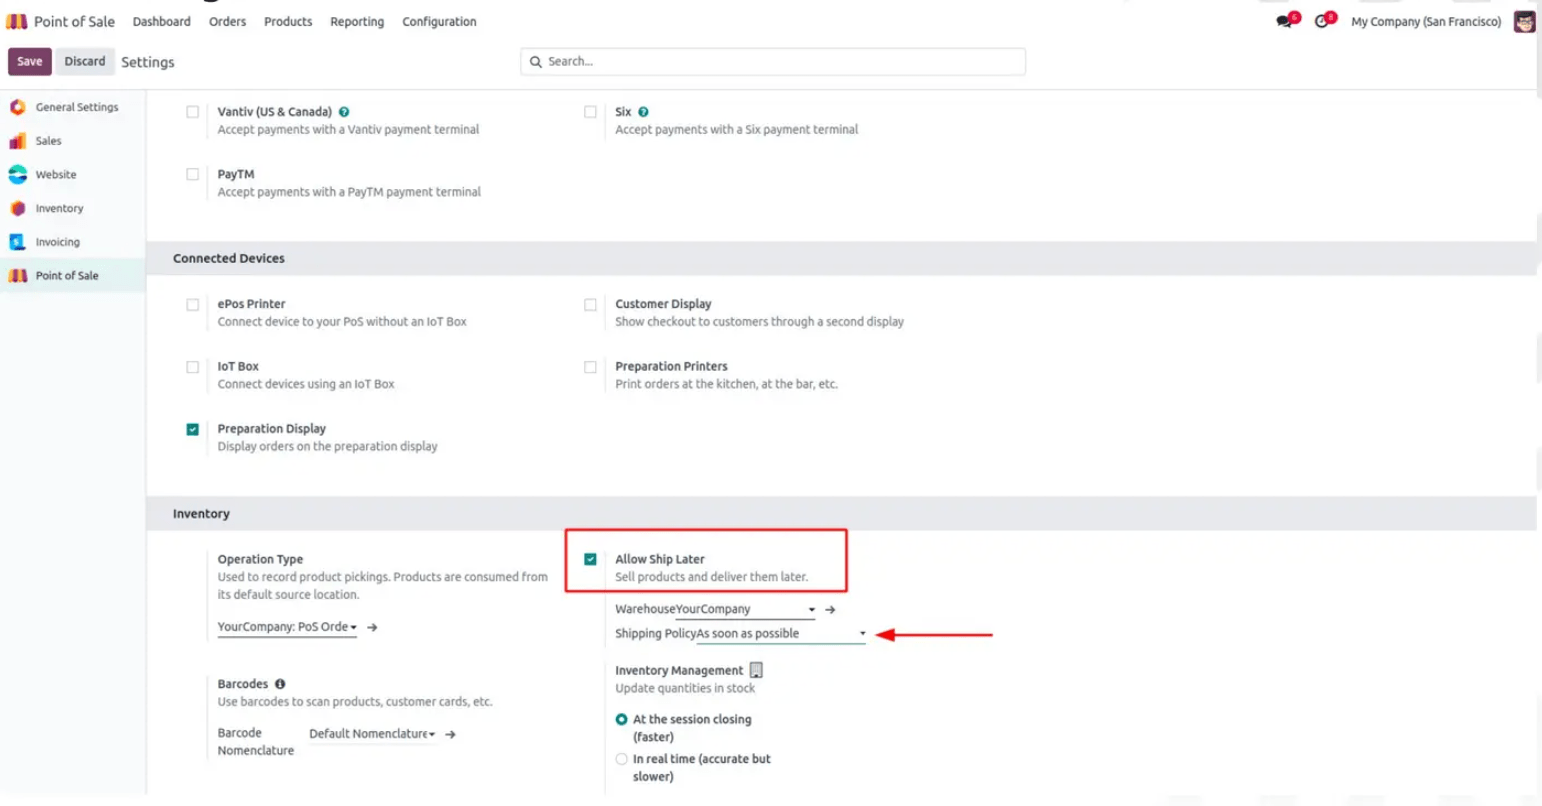
When configuring the Ship Later feature in Odoo, you can specify both the Warehouse and the Route to optimize your fulfillment process. Here’s how to set these parameters:
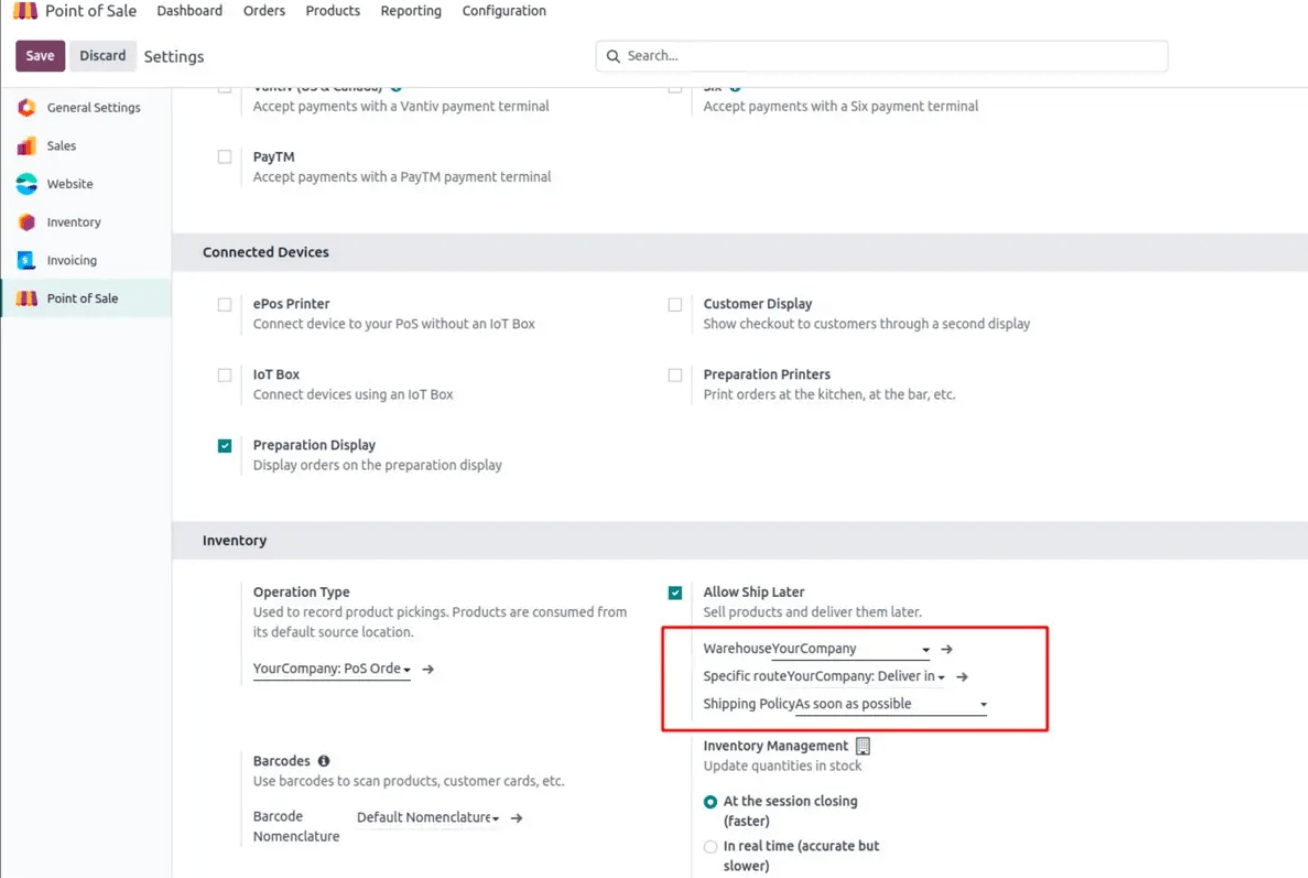
As Soon as Possible Shipping Policy
We will set the Shipping Policy to ‘As soon as possible’ in this scenario. This approach typically results in the partial shipment of items from the POS, creating multiple packages for the delivery of items in a single sale order.
For example, consider the product Acoustic Bloc Screens, which has an on-hand quantity of only 25 pieces available in stock. If we create a POS order requesting 50 pieces, we will need to go to the POS Dashboard and start a new session. This scenario demonstrates how the ‘As soon as possible’ policy works, leading to multiple shipments to fulfill a single order.
Enter the Opening cash for the session and get in to the billing screen of POS
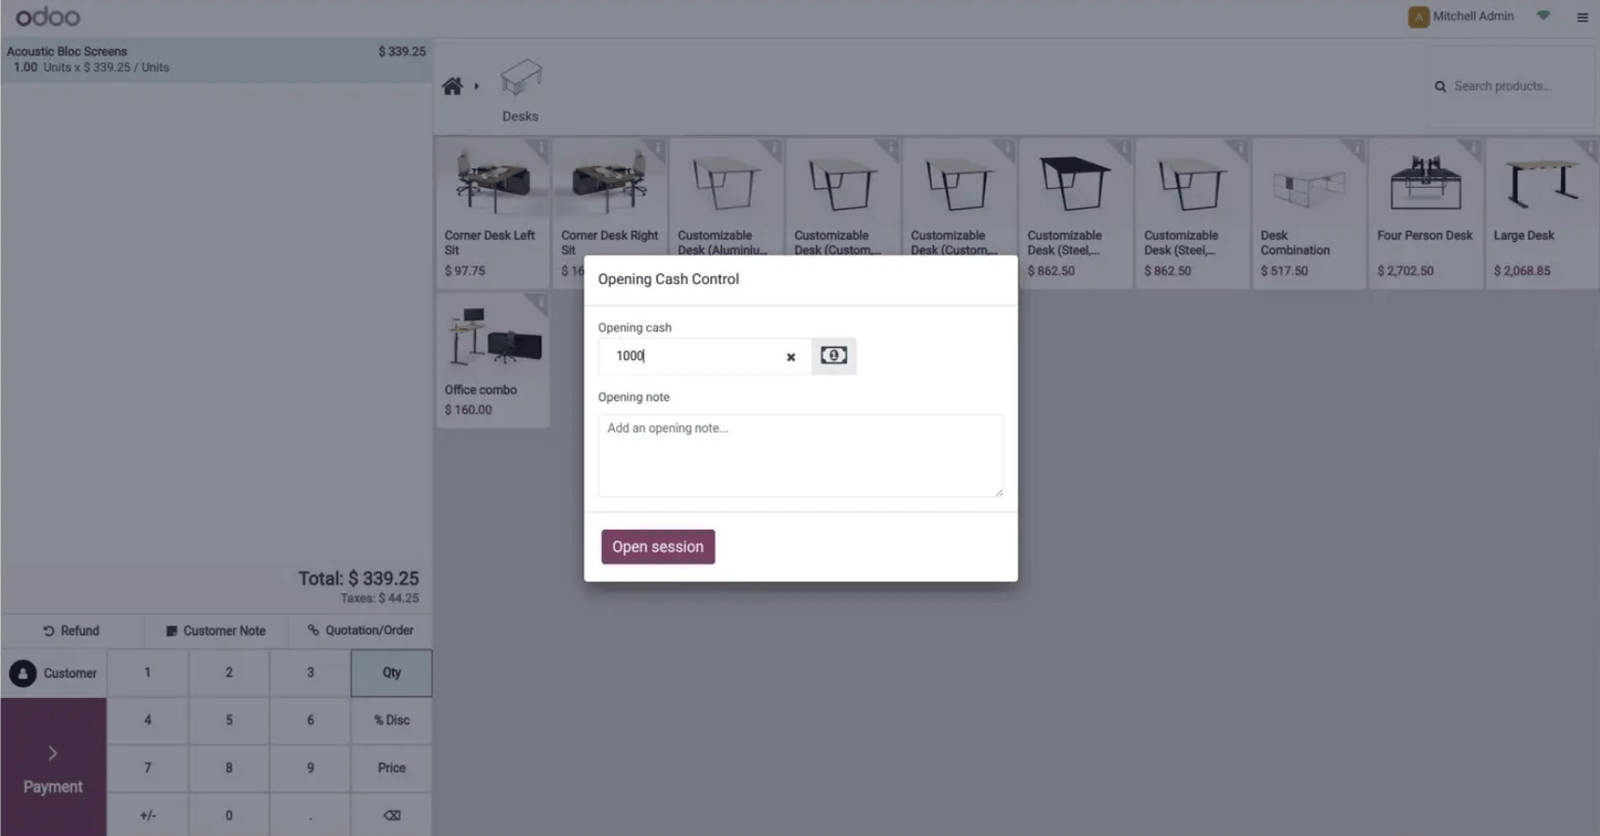
Here’s how to handle the order for Acoustic Bloc Screens in Odoo POS:
- Search for our product, Acoustic Bloc Screens
- Give the quantity and price.
- Select the customer from the below button.
- Make sure that the Address of the selected customer is correctly
- Given so that the shipping can be done later correctly.
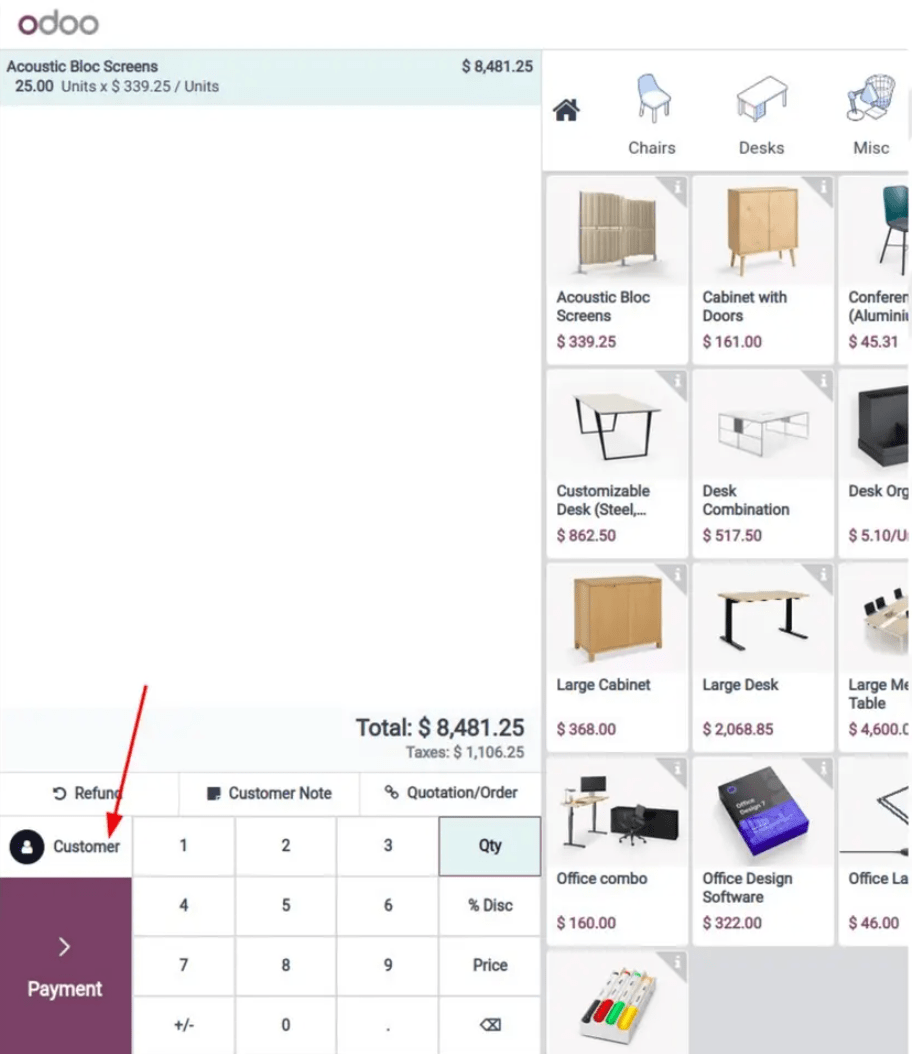
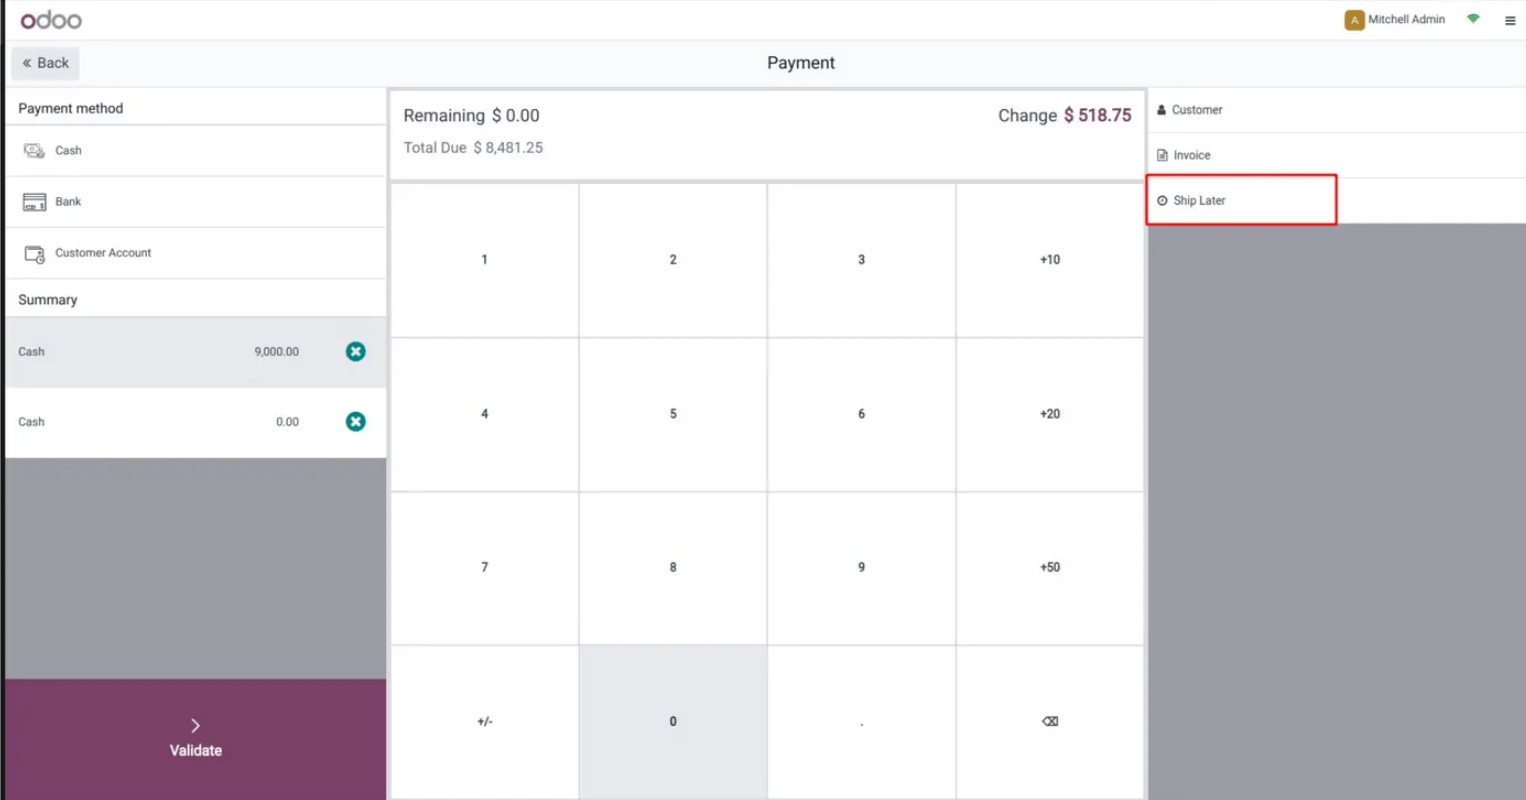
Now click on the Payment button. Choose the payment method from the left and choose the Ship Later option from the right side.
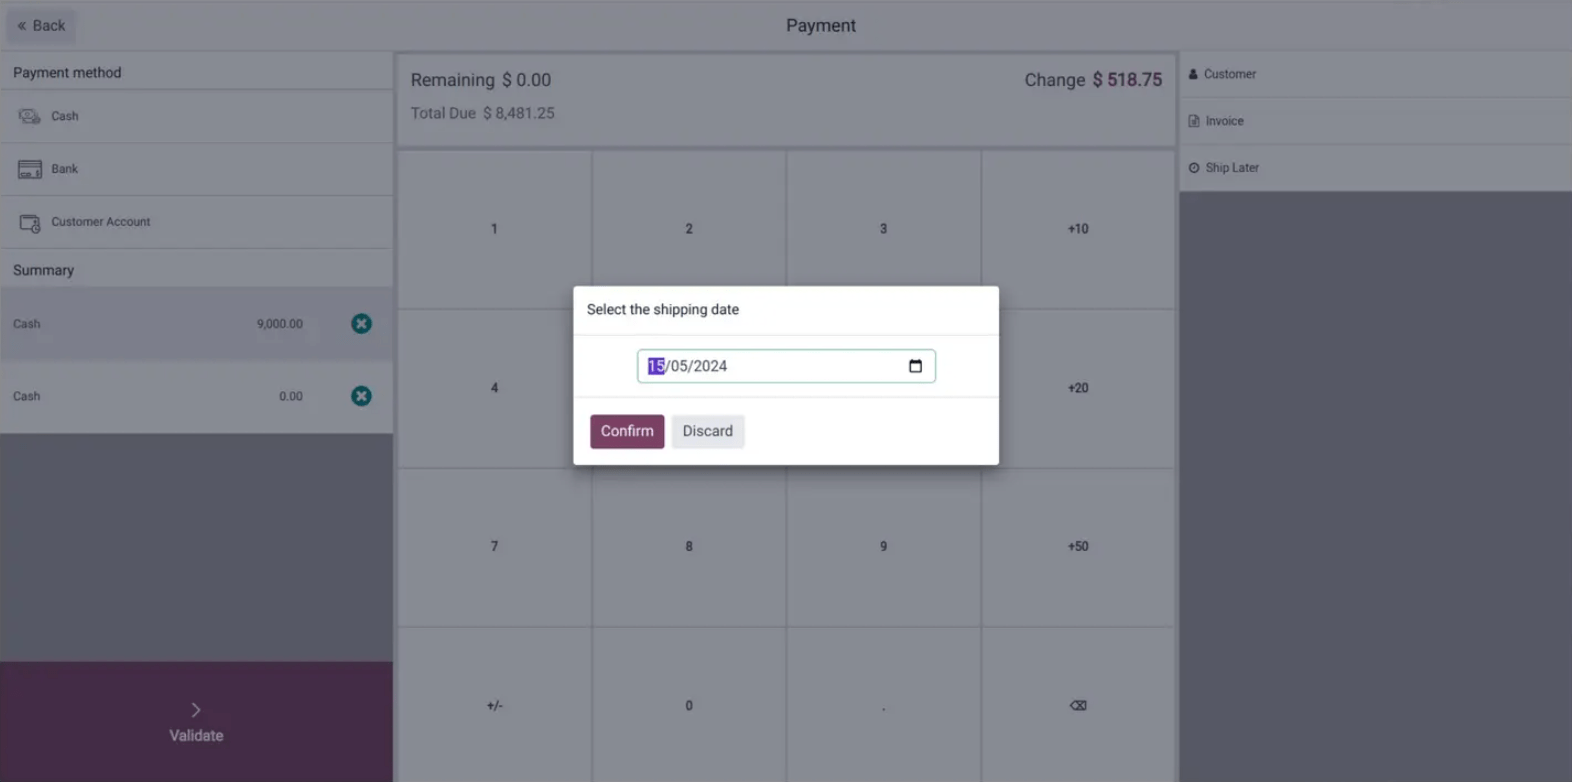
A popup will come there to select the shipping date. Fill it with the needed date and Confirm.
Then we can see the ship later with our scheduled date will be visible there. Now, click on Validate button on bottom left to finish the process and print the receipt.
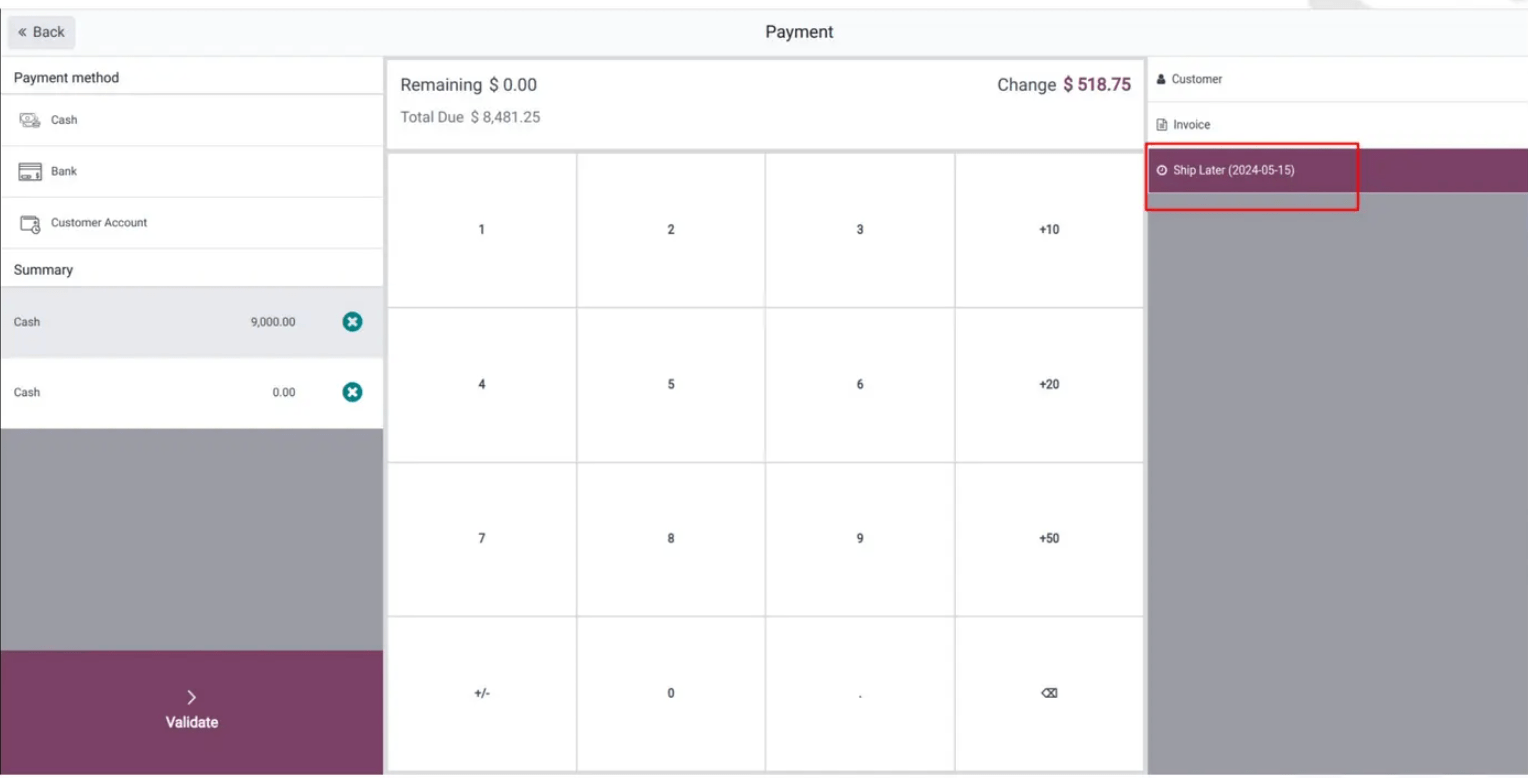
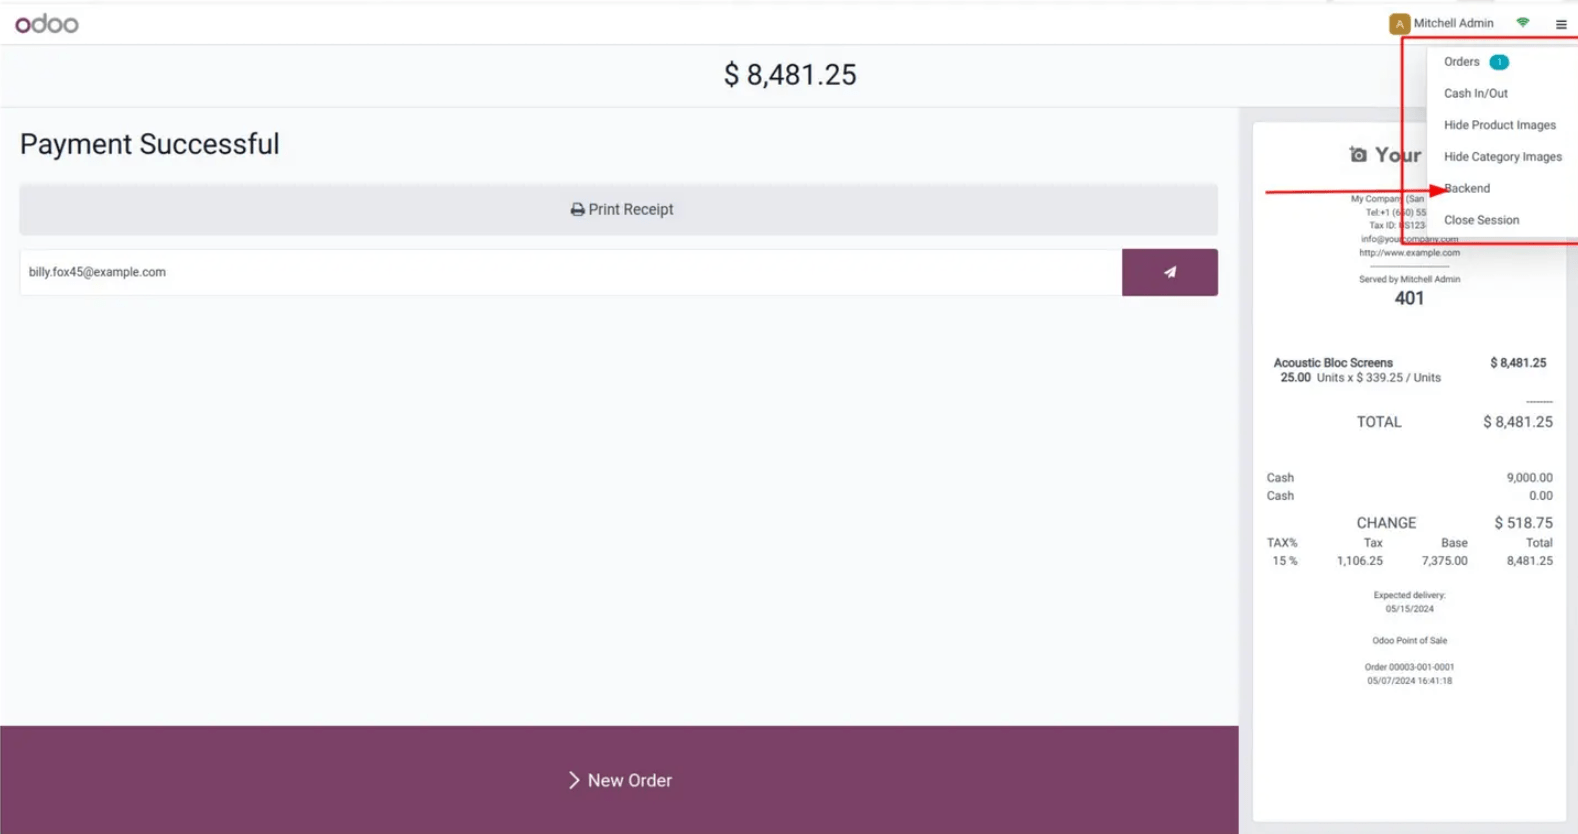
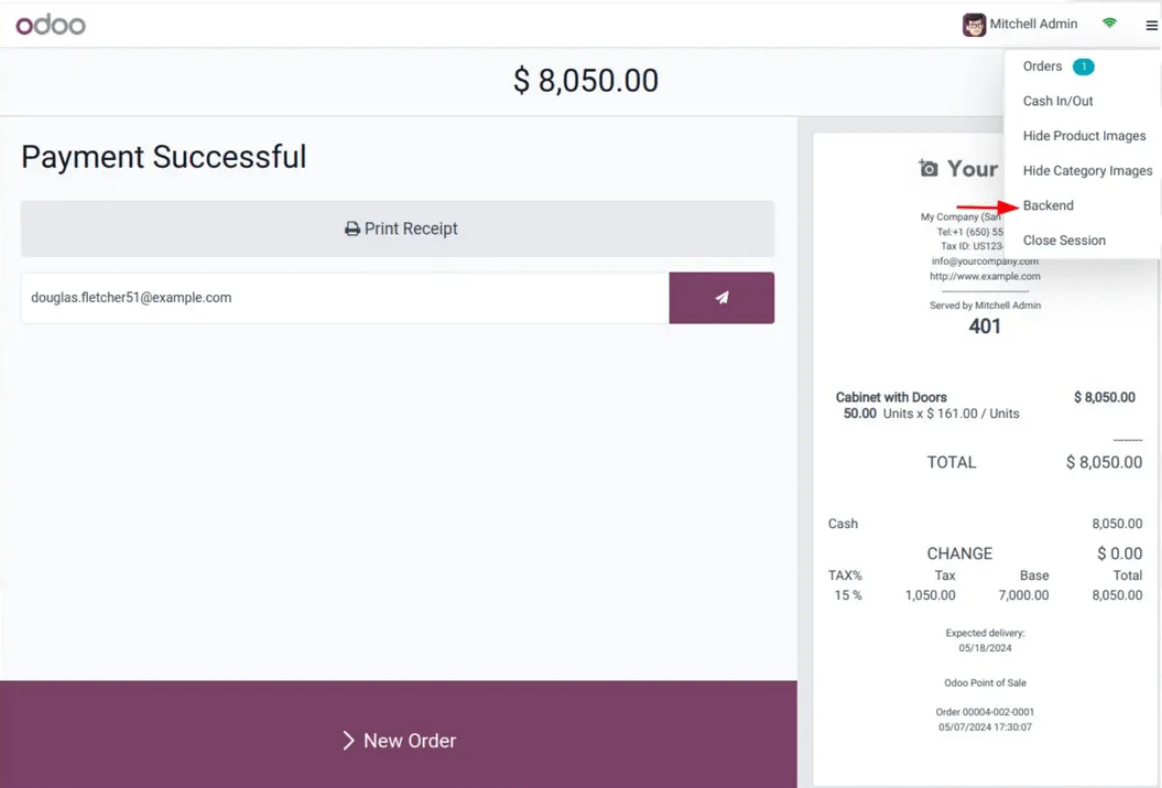
In order to deliver the item to the customer, we can just go to the backend on clicking the ‘Backend’ option from the top right menu.
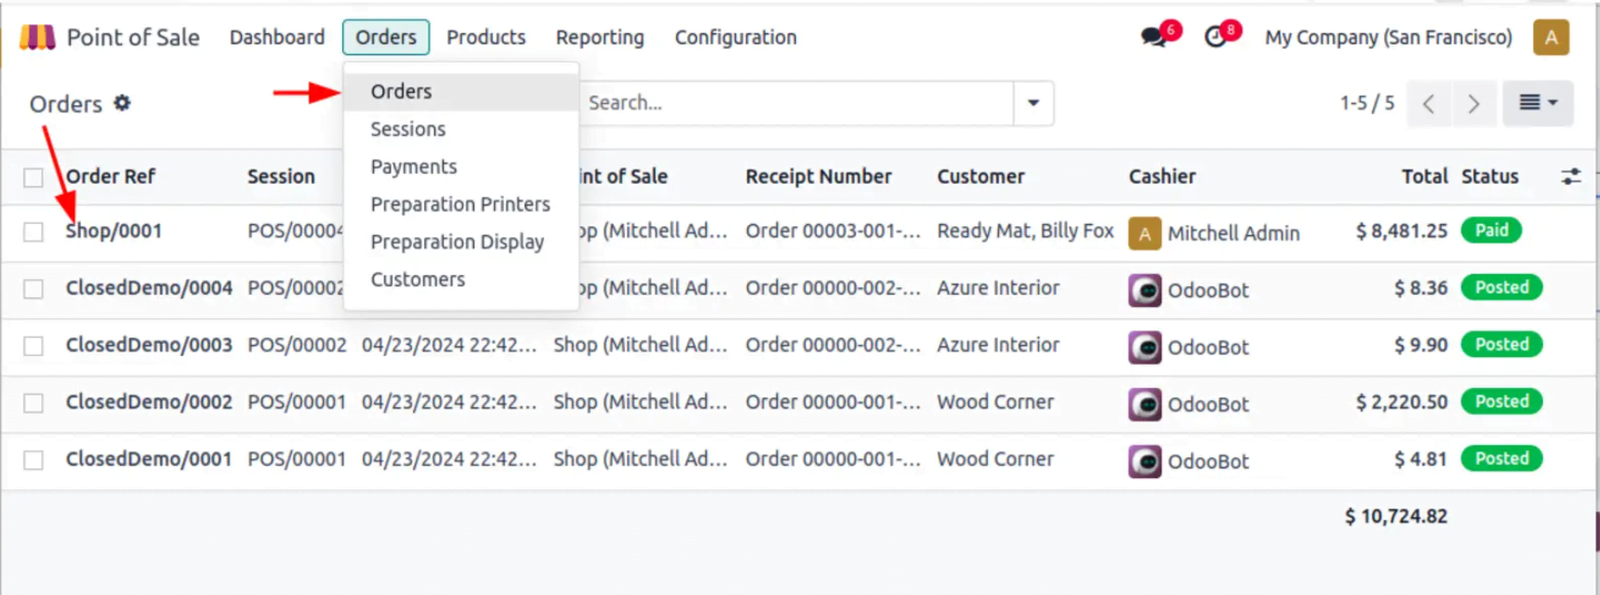
From the backend, Select Orders -> Orders menu to view all the POS orders.
There, we can open the order with Reference number Shop/001 we have just
While opening the record, we can see the details of the orders. The smart button on top can be seen with 2 Pickings because we’ve set the Route of the delivery in 2 steps.
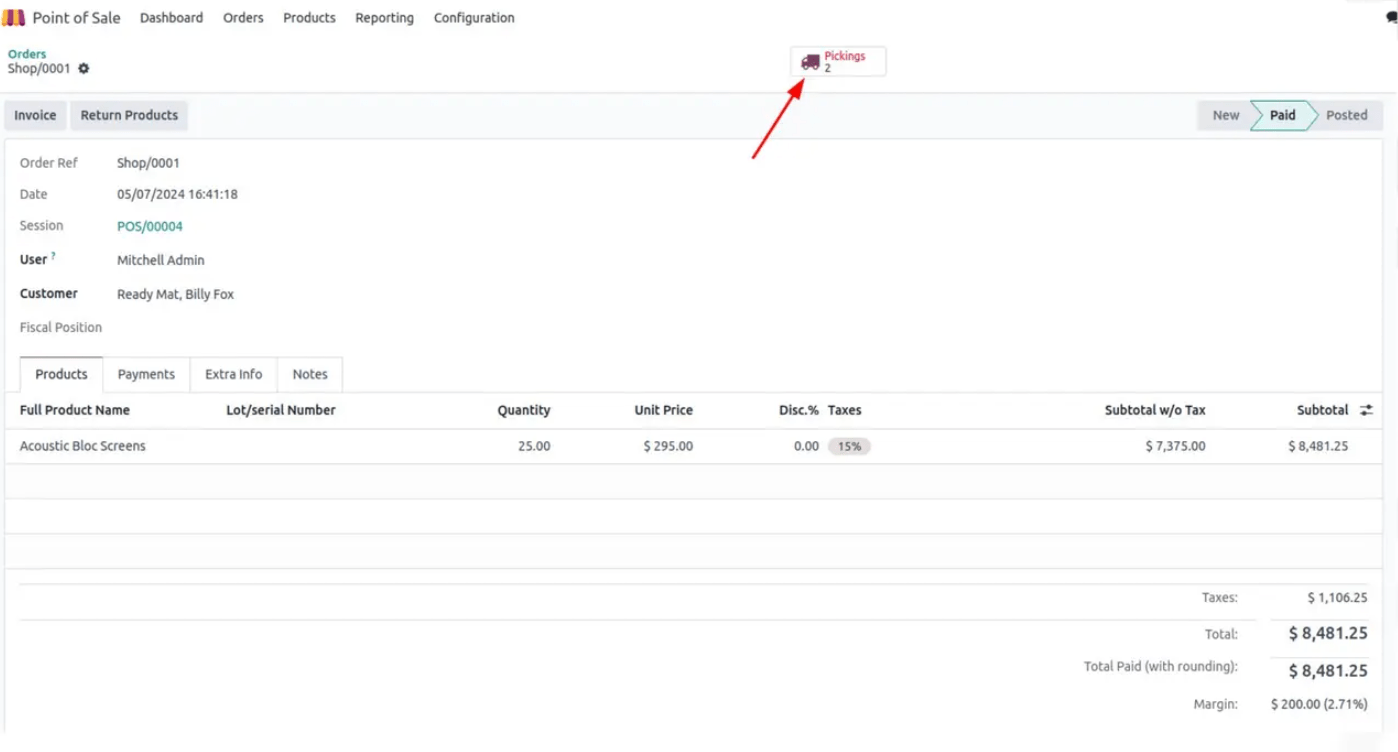
These pickings can be seen as the first once in the Ready state and the second one waiting for the first picking to complete

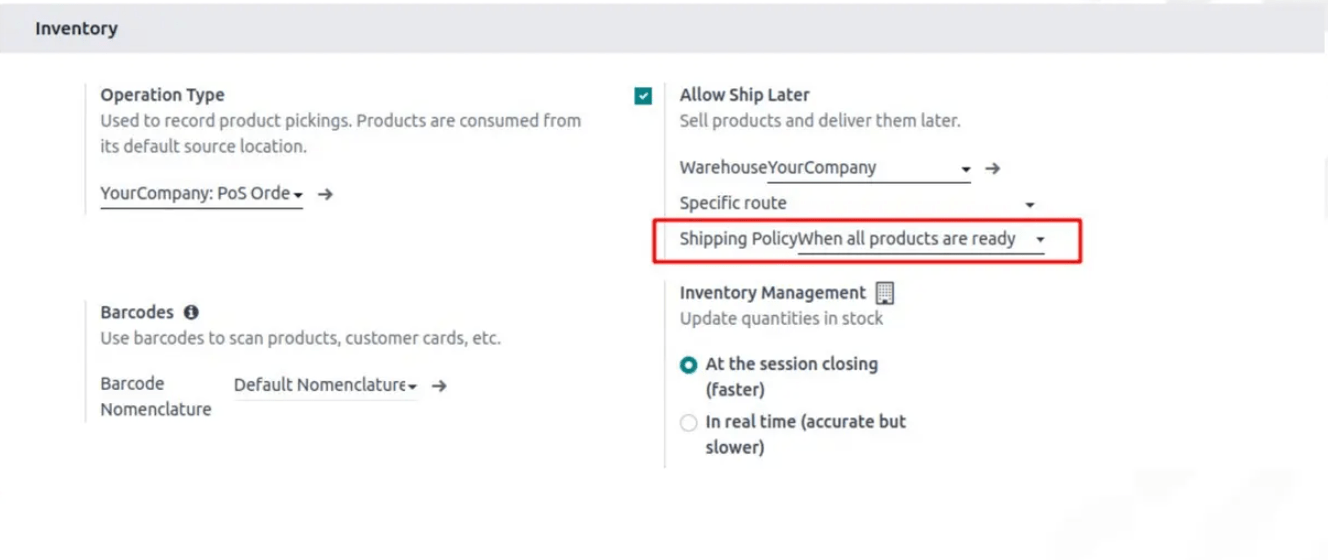
Shipping Policy When All Products are Ready
We will set the Shipping Policy to ‘When All Products are Ready’ in this scenario. With this approach, items can be shipped to the customer only when all products in the order are fully available in the warehouse.
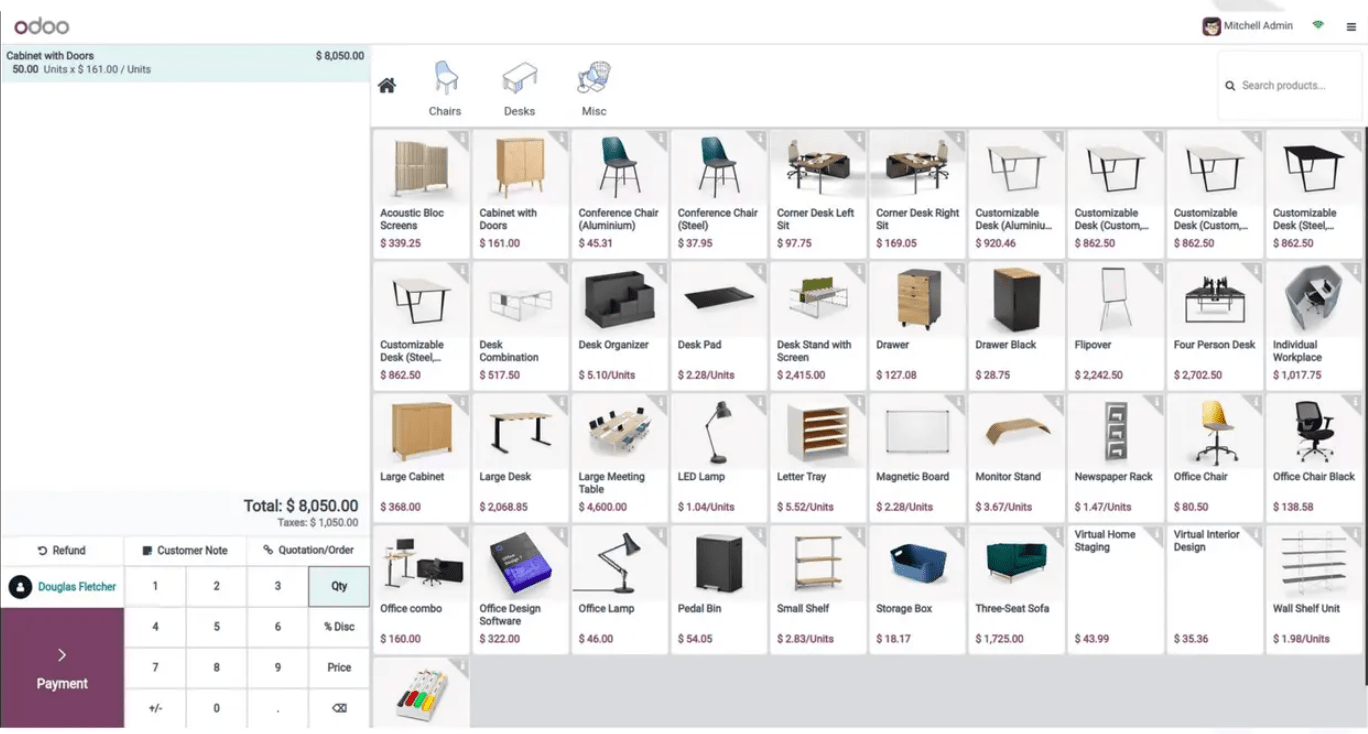
For example, consider a sale order for 50 pieces of Cabinets with Doors, where only 30 pieces are currently in stock. In this situation, we cannot ship the items to the customer until the entire quantity of the order is available in the warehouse. This policy allows us to manage the “Ship Later” process effectively, ensuring all items are shipped together.
For that, again go to the POS Dashboard and resume the session. Then add the product ‘Cabinet with doors’ and give the quantity 50 and select the needed customer.
Handling Payment and Scheduling
- Go to the Payment Screen:
- In the POS interface, after finalizing the order, you will be directed to the Payment screen.
- Add Payment Method:
- Choose the appropriate payment method from the options available (e.g., Cash, Credit Card, Bank Transfer).
- Enter the payment details as required.
- Select Ship Later Method:
- Find and select the Ship Later method you’ve configured (e.g., ‘As Soon As Available’) from the available shipping options.
- Schedule the Shipping Date:
- Enter the Shipping Date or schedule it based on the availability of stock. This ensures that the delivery is planned accordingly, in line with your shipping policy.
- Complete Payment:
- Confirm the payment details and process the payment. Ensure that the payment is successfully recorded.
- Get the Receipt:
- After completing the payment, you will receive a receipt or confirmation. Save or print the receipt as needed.
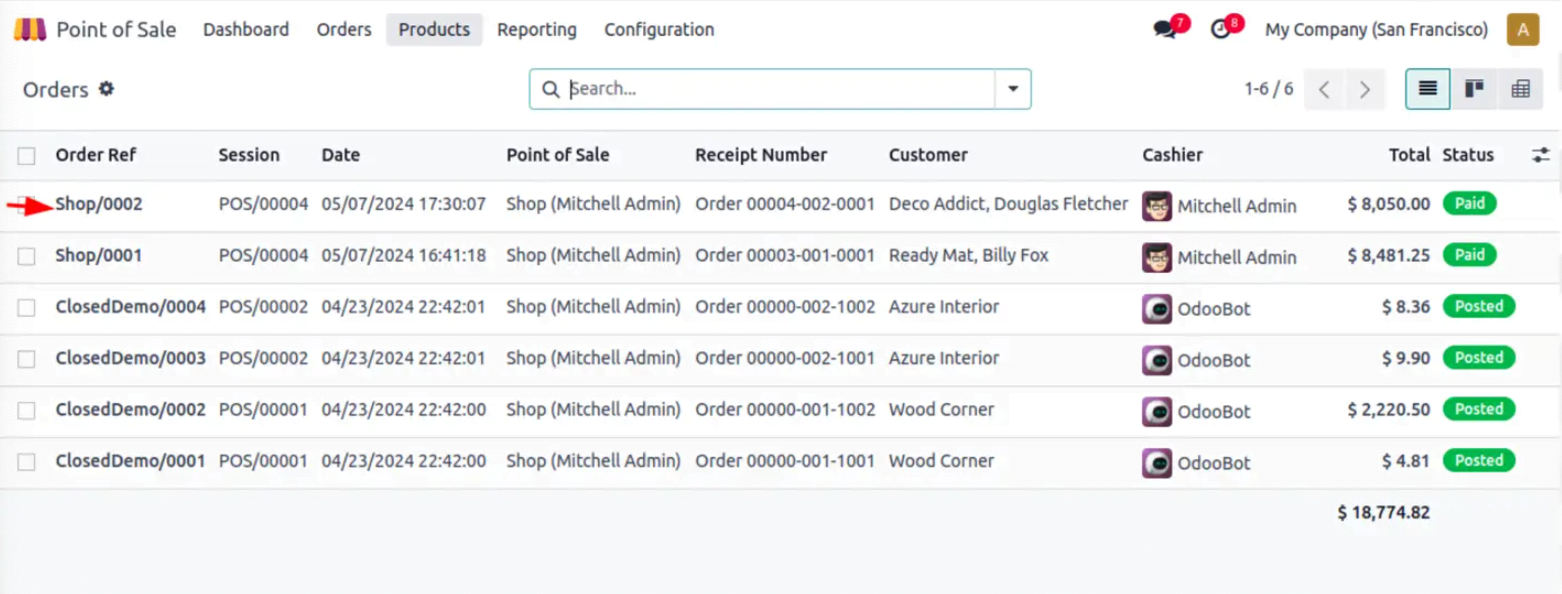
Now, from the Orders menu, open our new order with Reference number ‘Shop/0002’
Even without giving the 2 step delivery in the settings, there can be seen two pickings on the top of the order.
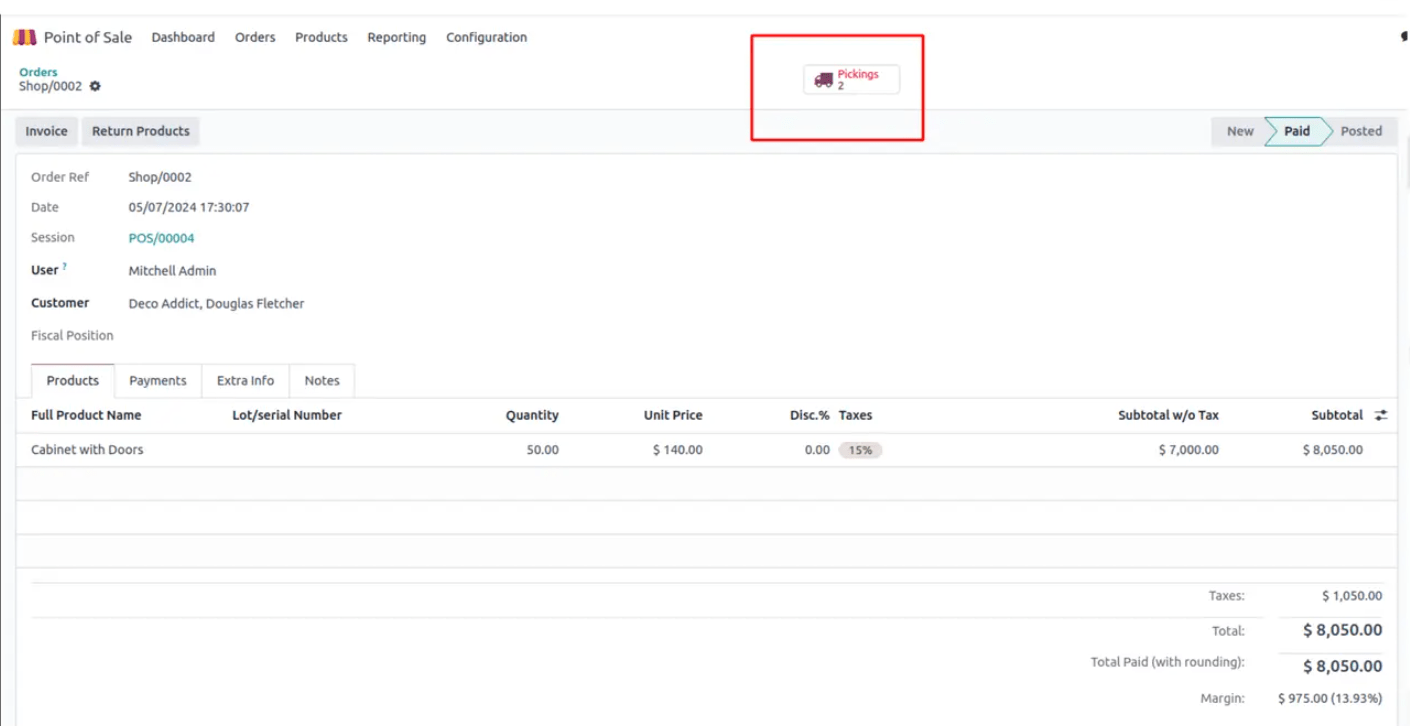
Click on the Pickings and see that both of them are in Waiting state. First one from Warehouse stock to Output is in ‘Waiting’ which denoted the system is waiting for the remaining 30 pcs to get filled in the warehouse. And the next picking is waiting for the former one to complete.

Reviewing the First Picking
- Open the First Picking:
- In the Inventory module, find and click on the first picking related to your sales order.
- Review the Picking Details:
- Demand Quantity: 50 pcs (this is the total quantity requested in the sales order).
- Available Quantity: 30 pcs (this is the amount currently available in the warehouse).
- Status: Waiting (indicating that this picking cannot be processed further until the remaining 20 pcs are available in the warehouse).

Just enrich the product quantity from Inventory as 50 just to see how the system behaves. Lets update the Onhand quantity 50 or more. Then come to the same picking and click on the ‘Check Availability’ button on top.
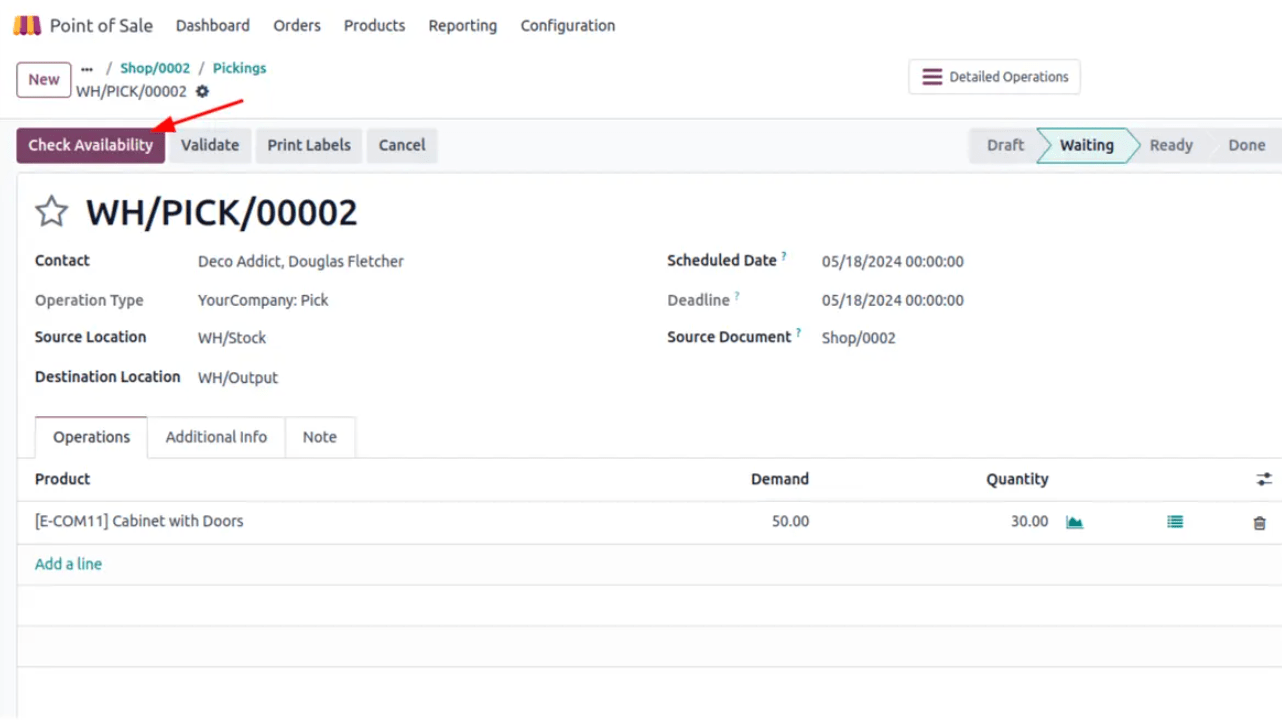
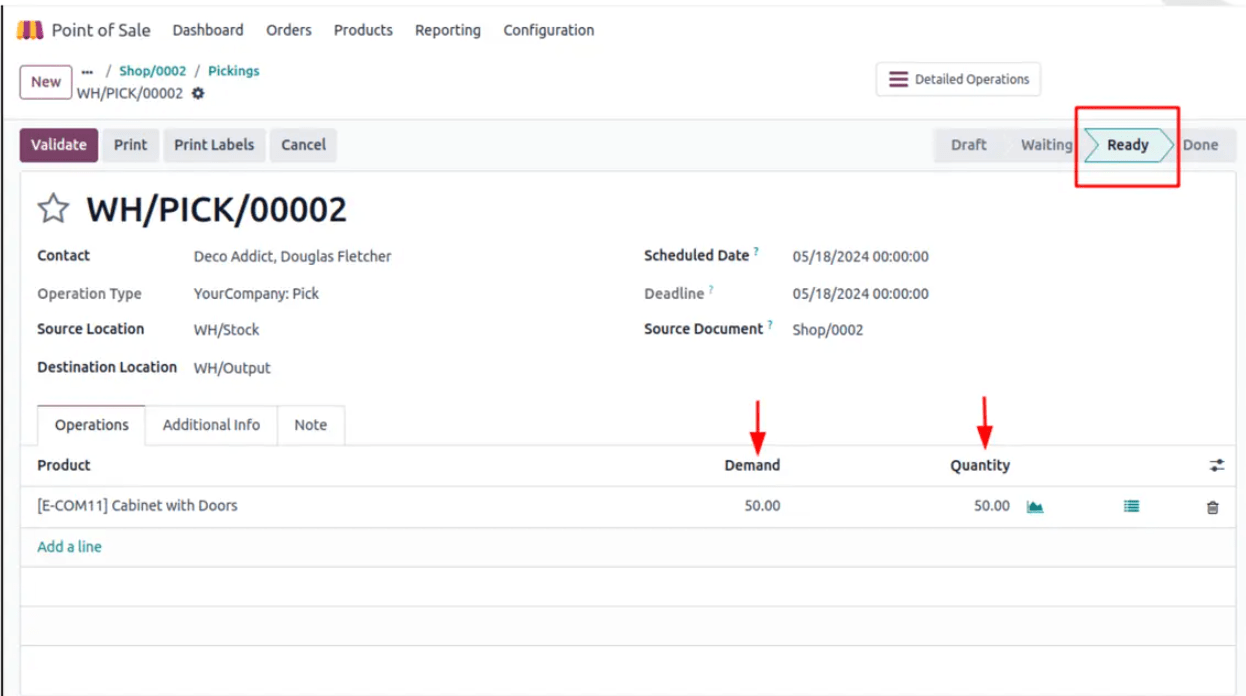
Then it fills with the available quantities and the ‘Waiting’ state is seen to have updated to ‘Ready’ state. Now we can validate the picking and do the rest of the operations smoothly.
